

You walk past it every morning — that scratched, stained, dull dining table that used to be the centerpiece of your home. Maybe it was your grandmother’s, maybe you scored it at an estate sale, or maybe years of family dinners have just done a number on it. Whatever the story, here’s the good news: you don’t need to replace it. Learning how to refinish a table is one of the most rewarding DIY projects you can take on, and the results can genuinely look like something you’d see in a high-end furniture showroom.
How to refinish a table sounds intimidating at first — stripping old finish, sanding down to bare wood, applying stain, sealing it all up — but once you break it into simple steps, it’s absolutely doable over a weekend. Thousands of homeowners do it every year to save hundreds (sometimes thousands) of dollars compared to buying new furniture.
Whether you’re working on a beat-up refinish dining table project, giving new life to a beloved refinish kitchen table, or tackling a wobbly refinish wood table from the garage, this comprehensive guide walks you through every single step. We’ll cover tools, techniques, common mistakes, wood types, finish options, and everything in between — so you can confidently start and finish this project yourself.
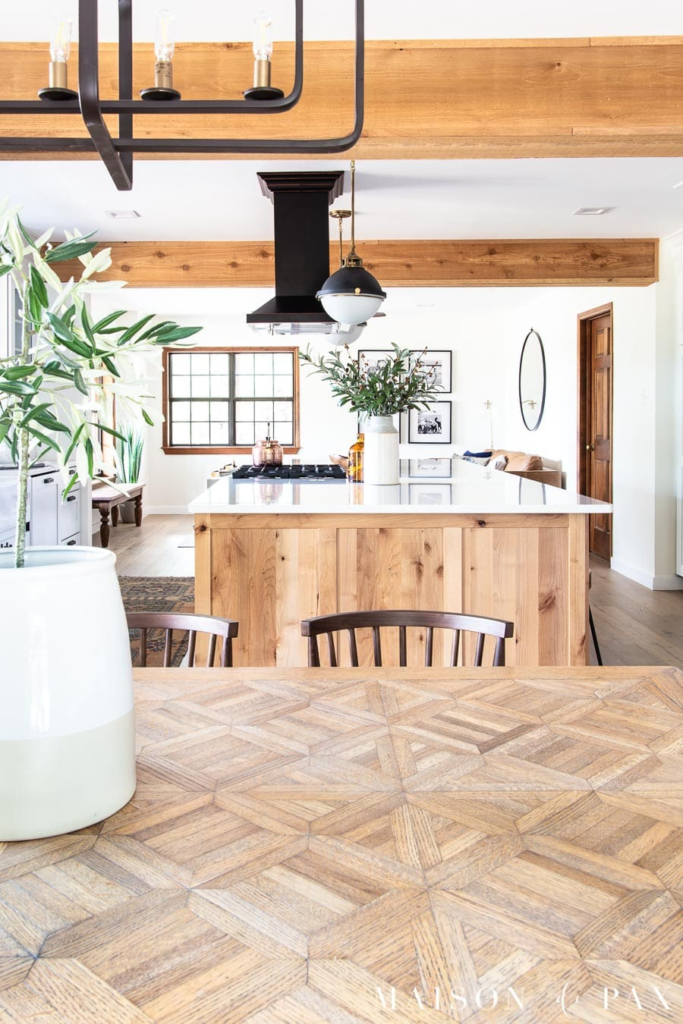
A beautifully refinished wood dining table — the kind of result you can achieve at home with the right steps.
Why Refinishing Your Table Is Worth Every Bit of Effort
Before we get into the how-to, let’s talk about the why. A lot of people wonder whether it’s even worth the effort to refinish a wood table when you can pick up a new one from a big-box store for a few hundred dollars. The answer is almost always yes — and here’s why.
Solid wood furniture, especially older pieces, is made from genuinely high-quality lumber that you simply can’t get in most new furniture today. Dining tables from the 1970s, ’80s, or even earlier were often constructed from thick, tight-grained hardwoods like oak, maple, and cherry. When you refinish dining table surfaces on these old workhorses, you’re restoring something that could easily last another 50 years.
The Real Cost Comparison
According to a 2023 survey by the National Association of Home Builders, refinishing wood furniture costs between $80 and $300 in materials depending on the size of the piece — compared to $500 to $3,000+ to replace a quality solid-wood dining table. Even factoring in your time, the savings are dramatic. Refinishing a kitchen table or dining room table yourself typically costs 70–85% less than replacement.
There’s also the environmental angle. Keeping a functional piece of furniture out of the landfill by doing a dining table refinishing project is a meaningful act of sustainability. And honestly? There’s something deeply satisfying about doing the work yourself and sitting down at a table you personally restored.
| Approach | Est. Cost | Time Required | Result |
| DIY Refinish | $80–$300 | 1–2 weekends | Custom, personal |
| Pro Refinish | $400–$900 | 1–2 weeks | Professional quality |
| Buy New (solid wood) | $500–$3,000+ | Immediate | New but generic |
Tools and Materials You’ll Need Before You Start
Success with any refinishing wood table project comes down to preparation. You don’t need a professional workshop — just the right supplies and a well-ventilated space. Here’s everything you’ll need to gather before you start how to refinish wood table work:
Essential Tools
- Random orbital sander (or belt sander for large surfaces)
- Sandpaper in multiple grits — 60, 80, 100, 120, 150, and 220
- Chemical stripper (for stubborn varnish or paint layers)
- Putty knives and plastic scrapers
- Tack cloth or microfiber rags for dust removal
- Paintbrushes and foam applicators
- Rubber gloves and safety glasses
- Drop cloth or tarp
- Wood conditioner (especially for softwoods like pine)
Materials for Refinishing
- Wood stain in your preferred color (oil-based or water-based)
- Polyurethane, lacquer, or tung oil for the topcoat
- Mineral spirits for cleanup
- Wood filler for gouges and cracks
- Pre-stain wood conditioner
- Steel wool (0000 grade) for between-coat smoothing
💡 Pro Tip: For a refinish oak table project, use oil-based polyurethane because oak has deep, open pores. For a refinish maple table, water-based finishes work beautifully and dry faster. Knowing your wood type shapes every product decision you’ll make.
Once you’ve assembled your supplies, clear a workspace. Lay down your drop cloth, make sure there’s airflow, and give yourself room to move around all four sides of the table. One thing most guides skip: check the condition of the table legs and joints before you do anything. If a joint is loose, now is the time to re-glue it with wood glue and clamp it overnight. Refinishing a dining room table while loose joints flex and crack is a recipe for a finish that fails in six months.
🪵 How to Refinish a Table: The 7-Step Process at a Glance
| 1 Inspect & Prep Check joints, clean surface, assess damage | 2 Strip Old Finish Chemical stripper or coarse sanding | 3 Sand Progressively 80 → 120 → 150 → 220 grit | 4 Fill & Condition Wood filler, pre-stain conditioner | 5 Apply Stain Even coats, wipe excess | 6 Seal & Topcoat 2–3 coats of poly or lacquer | 7 Final Sand & Buff 220 grit, then 0000 steel wool |
Step-by-Step: How to Refinish a Table from Start to Finish
Now let’s get into the real meat of this guide. This is the complete walkthrough for how to refinish a wood table — from the first pass with a scraper to the final coat of sealer. Take your time at each stage; rushing is the number-one mistake people make when refinishing a table.
Step 1 — Strip the Old Finish
The first task in any serious table top refinishing project is removing whatever is on the surface now. This might be old lacquer, polyurethane, paint, wax, or a combination of all four on an older piece.
For most tables, a liquid chemical stripper is the fastest approach. Apply it generously with an old brush, cover with plastic wrap to keep it wet, and let it sit for 15–30 minutes. When the old finish starts to bubble and wrinkle, scrape it off with a plastic putty knife. Work with the grain and be patient. Stubborn spots may need a second application. Once the surface is clean, wipe it down with mineral spirits and let it dry completely for at least two hours.
When to Skip Chemical Stripping
If the finish is thin, in good shape but just worn, or if you’re doing a light resurface wood table rather than a full strip, you can skip the chemicals entirely and start with 80-grit sandpaper. This is often the case with refinishing pine table surfaces, which are softer and easier to sand down to bare wood quickly.
⚠️ Safety Note: Chemical strippers contain strong solvents. Always wear nitrile gloves, safety glasses, and work outdoors or in a well-ventilated space. Keep children and pets away during this stage of the dining table restoration process.
Step 2 — Sand the Surface Progressively
This is the most labor-intensive part of learning how to sand and stain a table properly. The goal is to remove all traces of old finish, even out any scratches or dents, and create a smooth, open-grained surface that’s ready to absorb stain evenly.
Start with 80-grit sandpaper on your orbital sander. Work in long, even passes that follow the grain of the wood. Never sand across the grain — it creates scratches that stain will make glaringly obvious. Once the entire surface looks uniformly raw wood, switch to 120-grit, then 150, then finish with 220-grit for a silky smooth surface. After each grit change, wipe away all dust with a tack cloth before moving on.
Sanding by Hand vs. Power Sanding
For a refinish dining table top on a large surface, an orbital sander is a genuine time saver. But for curved aprons, table legs, and edges, you’ll need to sand by hand. The legs and base are just as visible as the top, so don’t rush them during your refinishing table and chairs project.
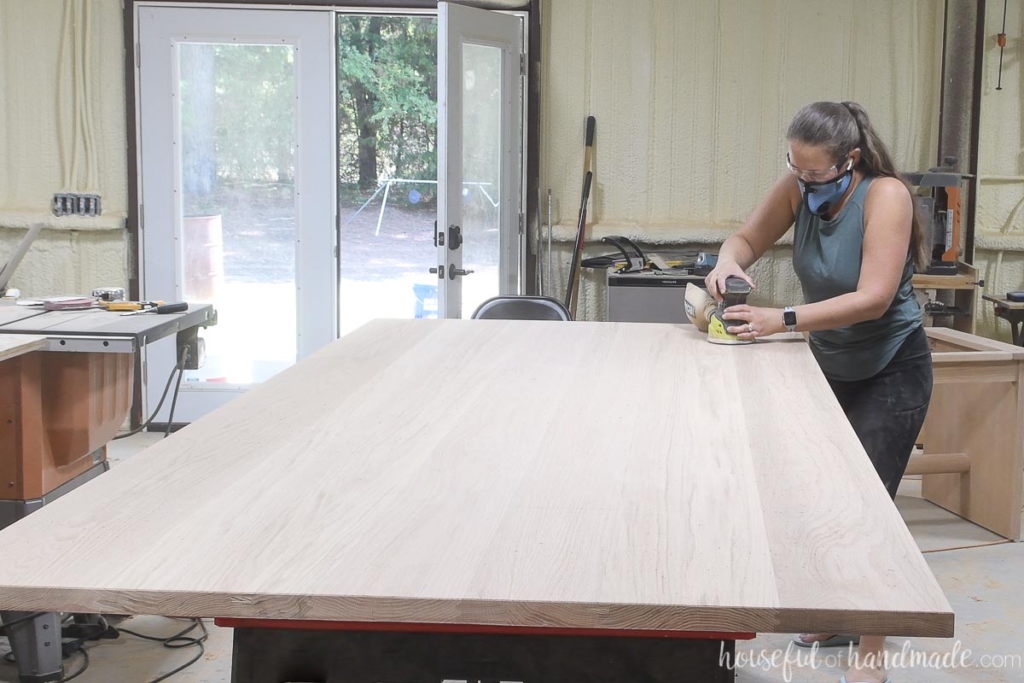
Progressive sanding — from 80 to 220 grit — is the foundation of a flawless refinish. Don’t rush this step.
Step 3 — Fill Imperfections and Apply Wood Conditioner
Once you’ve sanded down to bare wood and removed all dust, take a close look at the surface in raking light (a flashlight held at a low angle works great). You’ll spot any remaining scratches, small gouges, or nail holes that need to be filled.
Use a latex wood filler for shallow imperfections. Press it in firmly with a putty knife, overfill slightly, and let it dry fully before sanding flush with 150-grit. For deep gouges in a how to fix damaged wood dining table situation, a two-part wood epoxy filler gives a harder, more durable repair that won’t shrink over time.
After repairs are dry and sanded smooth, apply a pre-stain wood conditioner with a brush or rag. This is especially critical when doing a refinishing oak table project — the conditioner penetrates the wood, fills the pores uniformly, and ensures the stain goes on evenly rather than blotchy.
Step 4 — Apply Your Wood Stain
Staining is where the transformation becomes real. This is the moment in your how to restain a table project where you start to see the finished piece emerge. Choose your stain color carefully — test it on a hidden area like the underside of the table first, because stain always looks different on your actual wood than it does on the store’s sample chip.
Apply stain with a foam brush, a bristle brush, or a lint-free rag, working in the direction of the grain. Let it penetrate for 3–5 minutes (shorter for darker color, longer for richer penetration), then wipe off the excess with a clean rag using long, even strokes. The beauty of how to stain a dining table correctly is that wiping the excess controls the depth of color — the more you wipe, the lighter the result.
Let the first coat dry fully per the manufacturer’s instructions (usually 4–8 hours for oil-based, 1–2 hours for water-based). For a richer, deeper color on your staining dining table project, apply a second coat, wiping off the excess just as you did the first time. Two thin coats almost always look better than one heavy one.
Popular Stain Colors for Dining Tables
- Dark Walnut — timeless, hides wear beautifully, suits farmhouse and modern styles
- Early American — warm honey-brown, traditional, great on oak
- Ebony or Jacobean — dramatic and contemporary, especially on refinish wood dining table projects
- Natural/Clear — lets the wood speak for itself, ideal for maple or cherry
- Provincial — medium warm brown, versatile, suits refinishing kitchen table projects well
💡 Pro Tip: For a staining kitchen table that sees heavy daily use, choose an oil-based stain over water-based. Oil-based stains penetrate deeper and create a more durable base layer.
Step 5 — Apply the Topcoat Finish
The topcoat is your table’s armor. Without a good sealer, even the most beautiful stain job will be ruined in a few months by water rings, scratches, and heat marks. Choosing the right varnish for table top application depends on how you use your table and what look you’re going for.
Here are the main options when deciding how to finish and seal a dining table:
- Oil-based polyurethane — the gold standard for durability. Excellent resistance to water, heat, and scratches. Dries amber. Ideal for a refinish dining room table that sees heavy use.
- Water-based polyurethane — dries crystal clear, lower VOCs, dries faster. Excellent for most refinishing a dining table applications.
- Lacquer — dries very fast, hard and smooth finish. Popular in professional dining room table refinishing shops.
- Tung oil or Danish oil — penetrating finish, gorgeous natural look. Best for restore wooden table projects where you want a hand-rubbed look.
For most DIYers doing a refinish kitchen table top or dining room table, water-based polyurethane is the best combination of ease, durability, and results. Apply a minimum of three coats on a wood table surface that will see daily use, lightly sanding with 220-grit between each coat and wiping with a tack cloth before the next application.
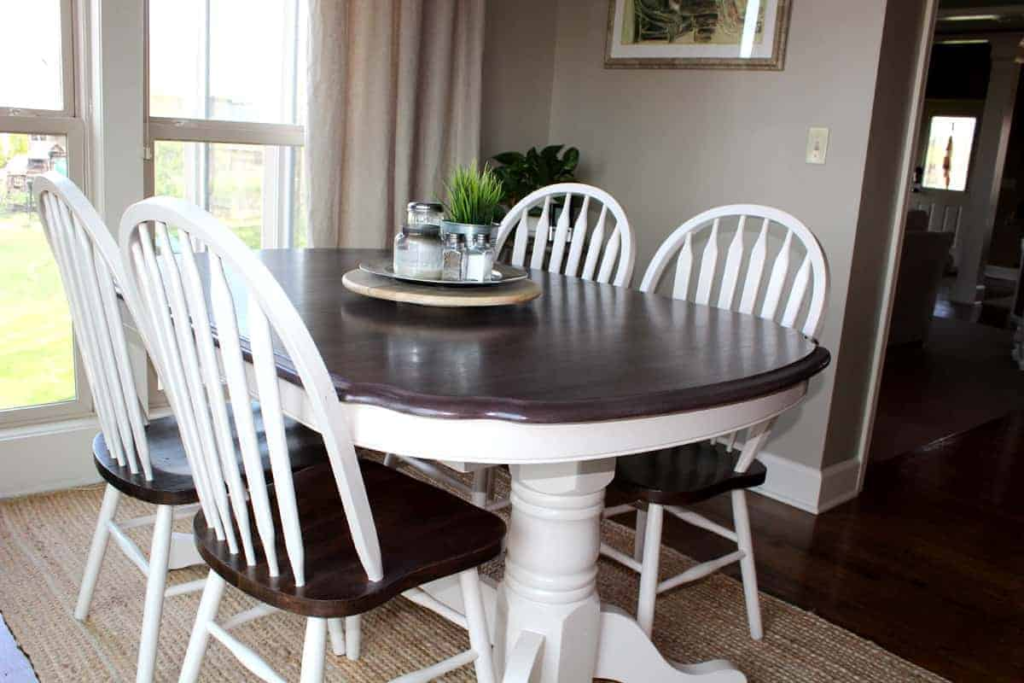
After staining and sealing: a refinished dining table can look completely transformed — and last for decades.
Special Situations: Refinishing Different Types of Wood Tables
Not every wood table refinishing job is the same. The approach changes depending on the wood species, the condition of the table, and what you’re trying to achieve.
How to Refinish an Oak Table
Oak is the most common wood in American dining furniture, and it comes with its own quirks. The biggest challenge with a refinish oak table project is the open grain — oak’s large pores soak up stain unevenly if you don’t use a good wood conditioner first. Always apply a grain filler or pre-stain conditioner on oak. For the topcoat on a refinished oak table, oil-based polyurethane is the classic choice — it enhances the warm amber tones of the grain beautifully.
How to Refinish a Laminate or Veneer Table
Many people wonder about a how to refinish a table that is not real wood situation — specifically tables that are laminate or thin veneer over particleboard. Laminate can be lightly sanded and repainted (using a bonding primer first), but you can’t stain it since there’s no wood grain to absorb it. If your table has a real wood veneer, you can lightly sand and restain, but be extremely careful not to sand through the thin veneer layer.
Refinishing a Painted Kitchen Table
Doing a redo kitchen table that’s been painted requires stripping the paint completely first — a heat gun or chemical stripper will both work — and then sanding to bare wood before staining. Alternatively, chalk paint is hugely popular for refinished kitchen table ideas projects since it doesn’t require sanding or priming and takes beautifully to wax or varnish topcoats.
How to Restore an Old or Antique Table
When you’re dealing with a genuinely antique piece, the approach to dining table restoration changes. The patina of old wood has real character and value. For antique restore dining table work, consider a gentler approach: clean with Murphy Oil Soap, address structural issues, lightly sand rough spots with 220-grit, and apply a fresh coat of paste wax or penetrating tung oil rather than stripping everything back to bare wood. Sometimes the best how to restore a wooden table approach is careful preservation rather than full restoration.
Common Mistakes to Avoid When Refinishing a Table
Even experienced woodworkers make these errors. Knowing them in advance saves you a lot of heartache mid-project.
Skipping Grits When Sanding
If you go from 80-grit directly to 220, you’ll leave behind deep scratches that stain will make brutally obvious. Always work through the grits sequentially during your how to sand and refinish a table process.
Applying Stain Without Wood Conditioner
On woods like pine, birch, or alder, skipping the pre-stain conditioner leads to blotchy, uneven stain absorption. It’s a five-minute step that prevents a disaster. Always condition before you how to restain wood table.
Not Letting Each Coat Dry Fully
Patience is the secret ingredient in any refinishing wood dining table project. Applying a second coat of polyurethane before the first has fully cured leads to a cloudy, tacky finish. Resist the urge to rush.
Sanding Across the Grain
Scratch marks from cross-grain sanding become highways for stain — they’ll stand out on your finished wood table surface. Always sand in the direction the grain runs.
Using Cheap Brushes
Cheap brushes leave bristle marks and bubbles in your finish. For a smooth varnish table application, invest in at least a 2-inch quality bristle brush or use a foam applicator for water-based finishes.
Maintaining Your Refinished Table: Making It Last
You’ve put real work into your refinished dining table — now protect that investment. Proper maintenance can extend the life of a refinished table significantly.
Daily Care Tips
- Always use coasters for drinks and trivets for hot dishes — even polyurethane can’t handle a 300°F cast iron skillet indefinitely
- Clean spills immediately with a damp cloth; don’t let water pool on the surface
- Avoid placing your dining table refinish piece in direct sunlight, which can fade stain and dry out the wood over time
- Use placemats during meals to protect against scratches from plates and cutlery
Annual Maintenance
Once a year, clean the entire surface with a wood-safe cleaner, then apply a thin coat of paste wax and buff to a shine. This adds a layer of protection on top of the polyurethane. If you notice the finish dulling after a few years, a light scuff sand with 400-grit followed by one fresh coat of polyurethane can restore the protection completely — no full refinishing a table job needed.
Frequently Asked Questions About Refinishing a Table
How long does it take to refinish a dining table?
A full refinishing dining table project — stripping, sanding, staining, and applying 3 coats of finish — typically takes two weekends. The actual hands-on work is about 8–12 hours, but drying time between coats adds up. Plan for at least 4–5 days start to finish for a proper refinish dining room table job.
Do I need to strip the old finish before refinishing?
For most how to refinish a wood table projects, yes. If the old finish is cracked, peeling, or deeply discolored, it must be removed before you can stain and reseal properly.
What’s the best way to strip old finish from a table?
For how to strip and refinish a table, a gel-based chemical stripper is usually most effective — it clings to vertical surfaces and works well on thick old finishes. Apply it, let it work for 15–30 minutes, then scrape and neutralize with mineral spirits.
How do I fix water rings or heat marks on my table before refinishing?
Before you start the full how to refinish a wood dining table process, try treating heat marks with a mixture of equal parts baking soda and non-gel toothpaste, rubbed gently with a soft cloth in the direction of the grain. For white water rings, rubbing with a damp cloth and a little petroleum jelly often works.
Can I refinish a table without sanding?
You can do a lighter resurface table refresh without heavy sanding — but only if the existing finish is in reasonably good shape. Liquid deglosser can scuff the existing finish chemically, allowing a new topcoat to bond. This is a good approach for a how to revarnish a table situation where you just want to refresh a dull finish.
What kind of finish is best for a kitchen table?
For a refinish kitchen table that will see heavy daily use, oil-based polyurethane in a satin or semi-gloss sheen is the most durable option. Apply a minimum of three coats for a refinished kitchen table — more than you’d use for occasional-use pieces.
How do I know if my table is solid wood or veneer?
Check the underside and edges of the tabletop. Solid wood will show continuous grain all the way through the edge. Veneer typically shows a seam at the edge where a thin layer of real wood is bonded to a different substrate. This matters enormously for refinishing wood table work because veneer can be sanded through very easily near the edges.
Can I change the color of my table darker or lighter when refinishing?
Going darker is easy — just apply a darker stain during your how to restain dining table project. Going lighter is more complex: you need to strip everything down to bare wood and possibly use a wood bleach to lighten the natural wood tone. Going lighter is definitely doable but requires more patience in the sanding and prep stages of your restaining dining table process.
Is there a way to refinish a table without a strong smell?
Yes — use water-based products throughout. Water-based stripper, conditioner, stain, and polyurethane all have dramatically lower VOCs than their oil-based counterparts. They’re an excellent choice for refinishing a kitchen table or dining table if you have limited ventilation. The results are slightly less warm in tone, but the reduced fumes make the project much more pleasant and safer.
Conclusion
There’s something genuinely special about sitting down at a table you brought back to life with your own hands. Whether it’s a massive refinished dining table that seats twelve at Thanksgiving, a compact refinished kitchen table in a cozy apartment, or a beloved piece you inherited that needed dining table restoration — the process is the same, and the reward is real.
Learning how to refinish a table properly isn’t about having a professional workshop or years of woodworking experience. It’s about patience, the right materials, and following the steps in order. Strip carefully, sand progressively, condition the wood, stain thoughtfully, and seal with enough coats to protect the piece for years to come. Avoid the common mistakes — don’t rush the drying time, don’t skip grits, don’t skip the conditioner — and you’ll end up with a result that genuinely surprises you.
The table in your dining room or kitchen has a story. With a little time and the right technique, that story gets a beautiful new chapter. Now go make something worth sitting down to.